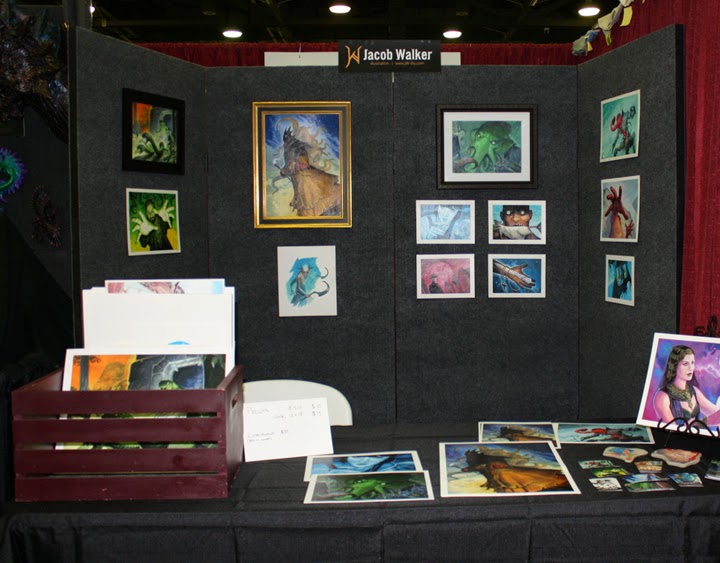
A couple years ago I blogged about how I made my display panels. I occasionally get asked about it so I am reposting it here on my current blog. Hit me up if you have any questions or suggestions.
First time using the panels were at my second ever show, Origins Game Fair in 2013.
Im branching out and starting to do shows this year and needed a professional way to display my work. After a good deal of looking around on the internet and checking out other artist both set ups I figured out what my needs were. Pro Panels seemed to fit what I wanted but were out of my price range. After talking to my friend David Pancake about the panels he had made, I decided to make my own but a little different. It was easy, and turned out well. Here is how I did it.
Supply list:
• 4 Hollow Lauan Doors
• 6 black Hinges
• 1 Gallon of black primer
• Outdoor Carpeting
• Carpet Glue and plastic trow
PRIME THE DOORS
Prime the doors with the black primer. A paint roller works great and takes no time at all. The primer seals the wood and gives a good surface for the carpet glue. Now let the primer dry overnight.
APPLYING CARPET
Prepare your carpet by cutting it down into strips about 5 to 10 inches wider than your door. Next roll them up so that you can place the lead edge down onto the glue and unroll with the carpet backing side down.
Next we started applying the carpet glue with the plastic trow that the sales associate recommended. You have about 20 minutes before it starts to set up so take your time and make sure the coverage is good and even. Get the edges good so that they do not peel up later.
Applying the carpet comes next. With the glue ready, my wife and I placed the lead edge down and slowly unroll the carpet, smoothing it out from the center as we went. Once we reached the end we would go back and press the carpet down and work the edges to get a better bond. I would then cut the excess carpet off with an exact-o-knife. Repeat for each door. I would let these have a day or two before hanging anything on them too.
ADD HINGES
Last step is to attach the hinges. I did this before priming and it was fine but waiting till after the carpeting would make it a little easier. For the center two hinges I cut out a spot for the hinges so that the doors could come together without a seem in the middle. This took a little more work but I felt it was worth it. Here are the tools I used to accomplish the task.
VELCO HOOKS
• Velcro patches
• Hooks
• Rivets
So the panels are complete but you need a way to hang your work. I was a little short on frames so many of my pieces I used little sticky back velcro squares on the back of my illustration board. If you try this route, put a peace of painters tape on your illo-board and then put the sticky back velcro on the tape so that it does not tear up the back of your board.
The larger framed pieces required a hook so I made a velcro hook. You can find these for purchase online but again I made my own and for less. The velcro patches, hooks and rivets can be found at most Michaels stores. I used an all to poke a hole near the bottom of a small 2"x2" or so sized piece of velcro, next placed the hooks over it and then put the screw together "rivets" in place. I real rivet gun would be preferred but these turned out great. They support the weight of my framed pieces quite easily. If you have a large piece, you can use larger velcro or double up a couple smaller ones.
EXTRAS
There are al kinds of nifty brackets and things that can be found at a hard wear store. This bracket for example is made to fit over a 2x4. As it so happens, it fits snuggly on my panels. It acts as a brace to sturdy up the doors and is great for attaching a sign to that extends above the panels.
Thats it. These four panels and 10 hooks cost about $300 total and were made over a weekend. If you have any question, IM me on Facebook or send me an email.


